_230x105.png)
60 GHz E2E Controller Onboarding
There are two ways to deploy 60 GHz E2E Controller:
| | External E2E Controller |
| | Onboard E2E Controller |
To Onboard the E2E Controller Network through Manage page:
| 1. | Navigate to Manage > Network > select 60 GHz cnWave E2E Controller. |
| 2. | Click Approve and 60 GHz cnWave–Network Onboard window appears. |
| 3. | By default, Auto-assign is selected you can select Auto-assign or Manual to update IPv6 address in E2E Network and wait for a while until IPv6 address gets updated. |
| 4. | After the upgrade, you can Enable Layer 2 Bridge which is optional. |
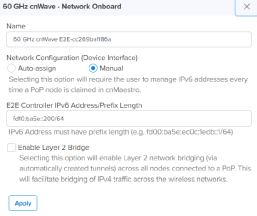
| 5. | Click Apply. |
| 6. | Wait for a while till network onboard is successful. |
.png)
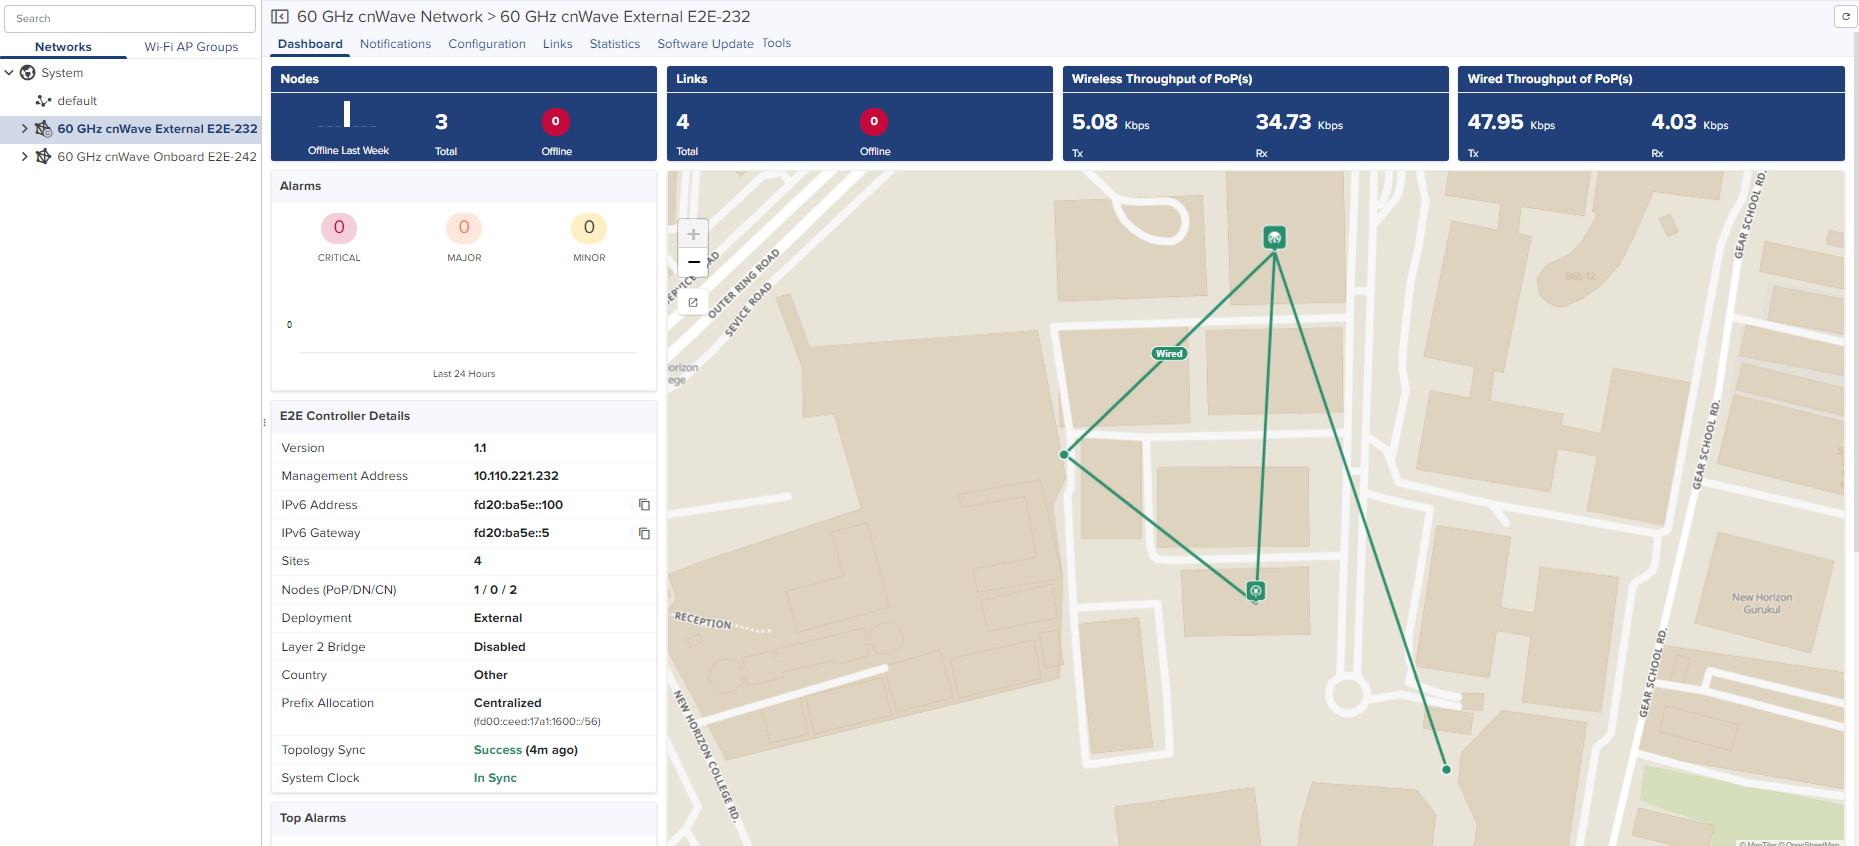
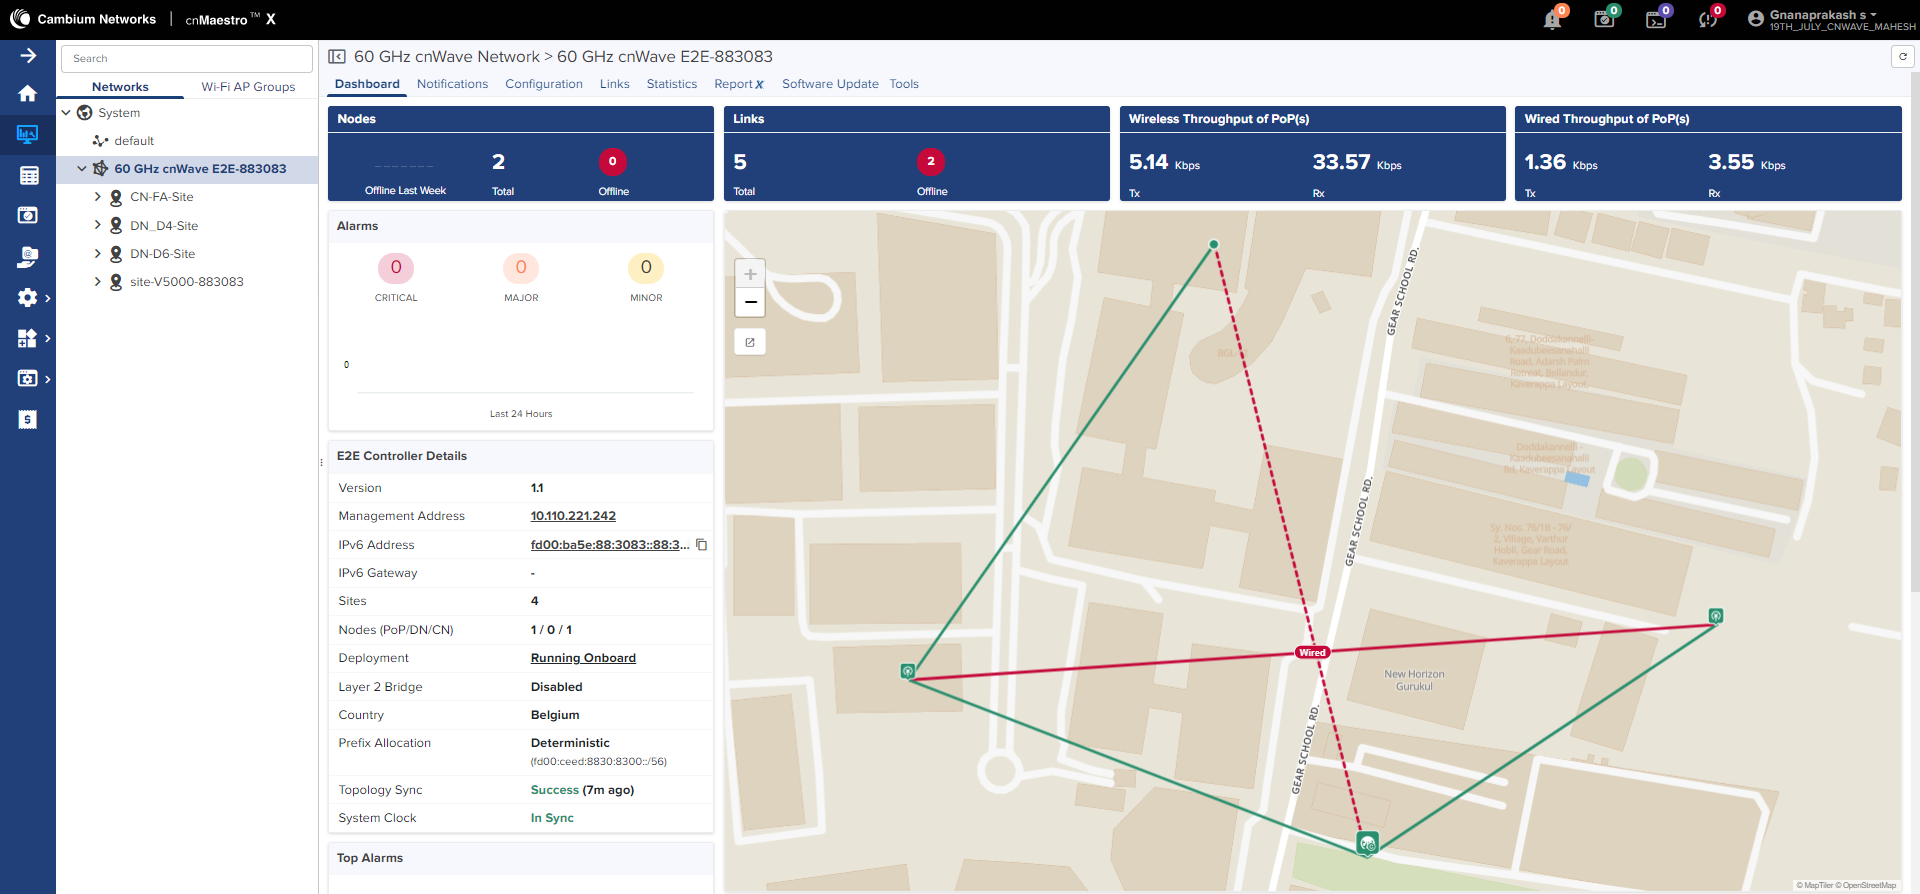
| 7. | After successfully onboarded, the E2E Network UI shows the Dashboard of the network as shown below: |
External E2E Controller network icon will be indicated with icon  as shown below:
cnMaestro remote management details are configured through onboard E2E controller. The Onboard E2E Controller is hosted on a 60Hz cnWave device. (E2E Controller option to be enabled in the device UI).
To approve proceed as follows:
| 1. | Navigate to Manage > Network > select 60 GHz cnWave E2E Network. |
| 2. | Click Approve. |
.png)
60 GHz cnWave-Network Onboard window appears. Edit network name and click Save.
.png)
| 3. | Wait for a while till network onboard is successful. |
.png)
| 4. | After the successful Onboard E2E Network, it can be managed through cnMaestro. |
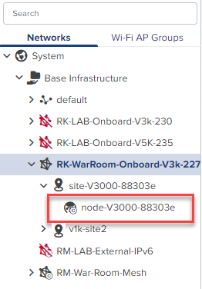
If PoP Node is running the Onboard E2E Controller then the PoP icon will be indicated with  as shown below:
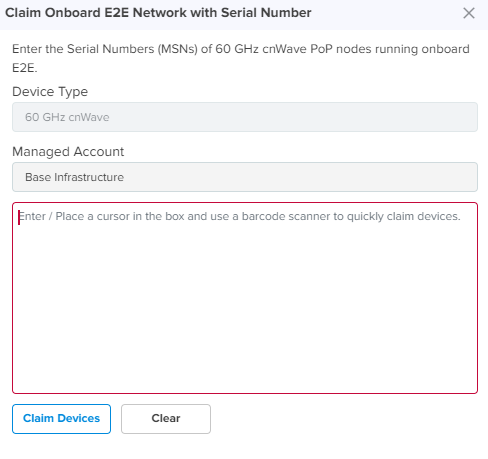
From homepage click Onboard icon in the left pane, to claim Onboard E2E devices.
| 1. | Navigate to Onboard > 60GHz cnWave Network > click Claim Onboard E2E. |
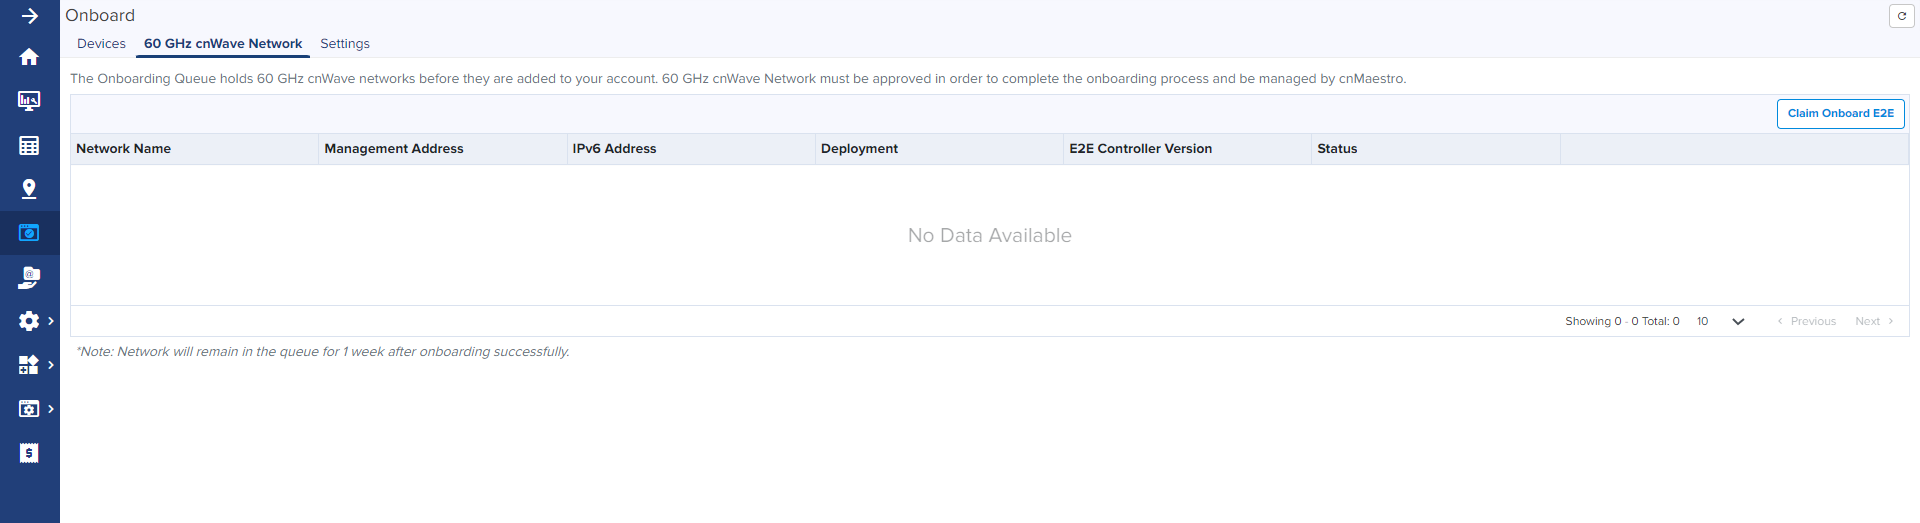
Claim Onboard E2E Network with Serial Number windows appears.
| 2. | Enter Serial Number and click Claim Devices. |